martech development | google sheets
Maximize Marketing Analytics with Google Sheets Connector
26 476
Active users
104 040
Tracked Сampaigns
832 000
Tracked Ads
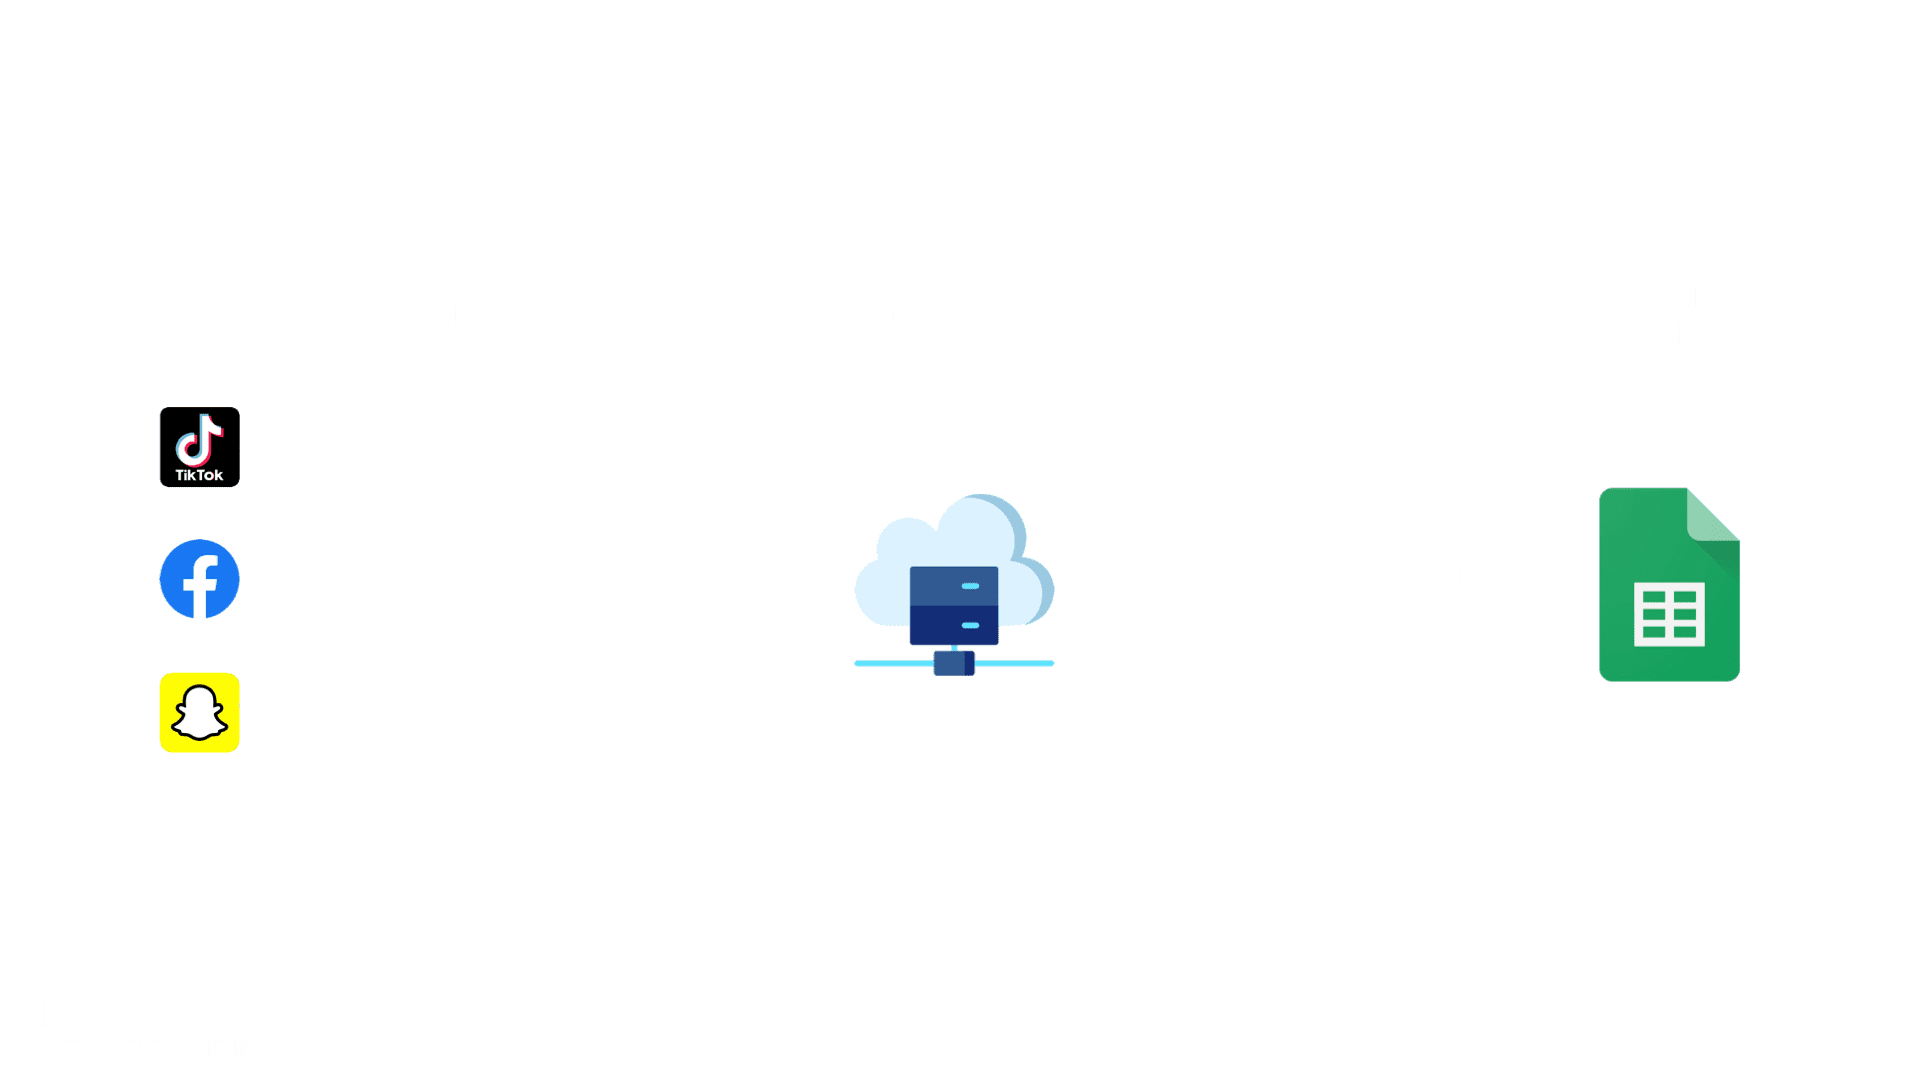
Free and Seamless Data Integration: Centralize Your Facebook, TikTok, and Snapchat Ads Data Inside Google Spreadsheet!
Data Pipeline

Get Free Access To Facebook Connector
Use a ready-made Google Sheet connector for the most popular ads platforms

Facebook Ads Insights
Enhance Your Facebook Ads with Seamless Google Spreadsheets Integration. Unlock Real-Time Insights for Data-Driven Business Decisions. Effortlessly Import, Boost Productivity, and Maximize ROI with Our Powerful Connector.

Snapchat Ads Insights
Empower Your Snapchat Ads with Smooth Google Spreadsheets Integration. Access Real-Time Insights for Informed Business Decisions. Effortlessly Import, Boost Productivity, and Maximize ROI with Our Powerful Connector

To use your Facebook Ads Insights Connector for Google Spreadsheets or test it with Sample Data, follow these instructions:
-
Open the provided Google Spreadsheet template through the given link and make a copy in your preferred location on Google Drive.
-
Navigate to the ‘Facebook’ sheet within the spreadsheet.
-
In the menu, click on ‘SHEMETOV’ and select ‘Social Insights’ and then ‘Facebook Insights’ from the dropdown menu. This will open the connector’s settings window on the right side.
-
To utilize the connector, you will need the following data:
- Facebook Account Id
- Facebook App Id
- Facebook App Secret
- Facebook App Token (generated with permissions for ‘read_insights, ads_management, ads_read, business_management’ from developers.facebook.com)
- Ads Type (select from the dropdown menu the desired type of data to retrieve; you can choose from various types of advertisements)
- Date Range (choose ‘Sample Data’ from the dropdown menu to test with Sample Data or select a specific date range)
Additionally, you will need the ‘Shemetov token,’ which you can acquire by registering through the provided registration form.
-
To test the connector with Sample Data, choose ‘Sample Data’ from the Date Range selection dropdown menu. You will receive a test dataset for 25 different types of advertisements.
-
In the Ads Type selection dropdown menu, select the desired type of data you want to analyze or work with from the sample dataset.
-
Fill in all the required data in the sidebar menu, including the necessary tokens and credentials.
-
Click the ‘Get Data’ button. This will fetch the advertising statistics data onto the Facebook sheet.
By following these steps and providing the required data, you can test the Facebook Ads Insights Connector with Sample Data or use it to retrieve and analyze your advertising data conveniently within Google Spreadsheets with real Facebook data.

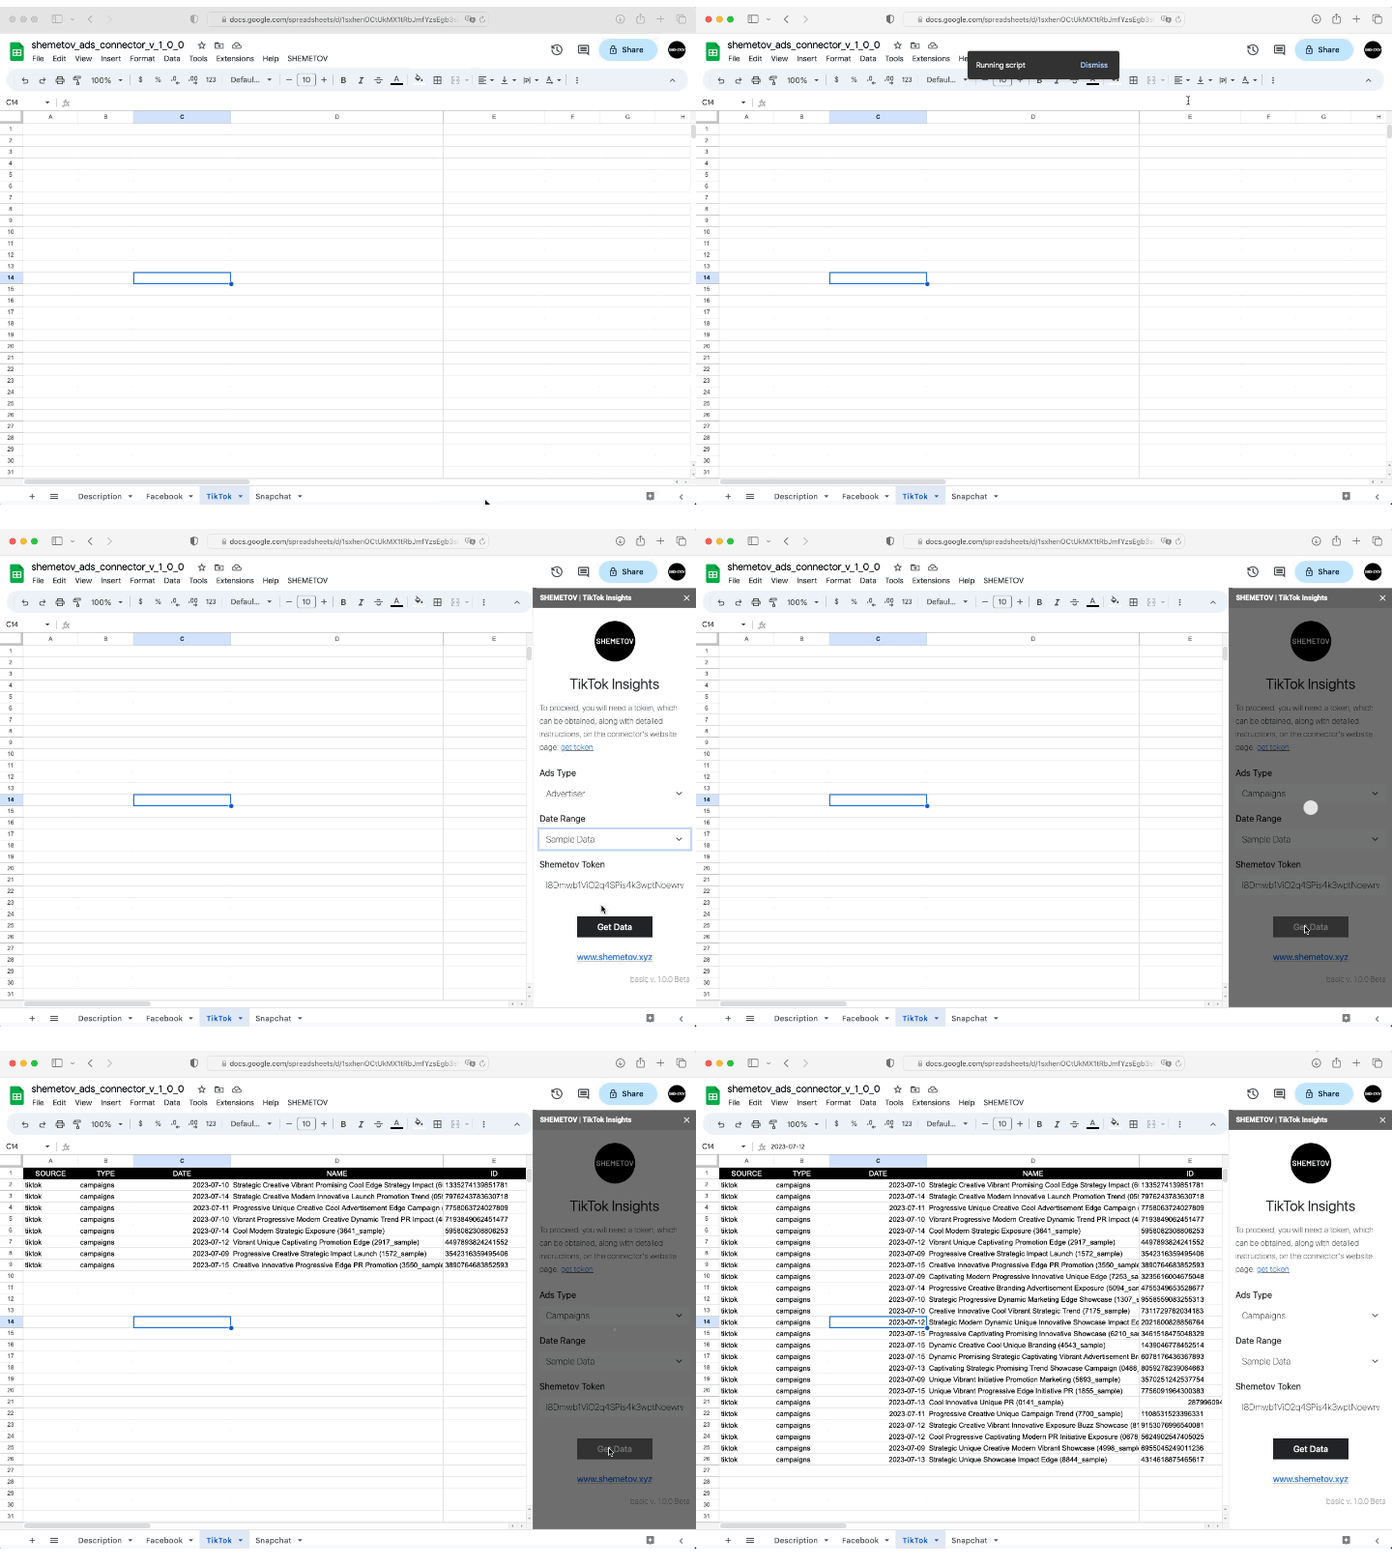
To utilize the “TikTok Ad Insights Connector” for Google Spreadsheets and experiment with Sample Data, follow these easy-to-follow instructions:
-
Access the Unique Google Spreadsheet Template:
- Open the exclusive Google Spreadsheet template via the provided link.
- Make a copy of the template in your preferred location on Google Drive.
-
Explore the ‘TikTok’ Sheet:
- Inside the spreadsheet, navigate to the sheet labeled ‘TikTok.’
-
Access the Connector’s Settings:
- In the menu bar, click on ‘SHEMETOV.’
- Choose ‘Social Insights,’ followed by ‘TikTok Insights’ from the dropdown menu.
- The connector’s settings window will appear on the right side of the screen.
-
Gather the Necessary Data:
- To make use of the connector, ensure you have the following information at hand:
- TikTok Advertiser ID
- TikTok Access Token
- Ads Type (Select your preferred advertisement type from the dropdown menu.)
- Date Range (You can either choose ‘Sample Data’ from the dropdown for testing purposes or select a specific date range.)
- You will also need the ‘Shemetov Token,’ which can be obtained by registering through the provided form.
- To make use of the connector, ensure you have the following information at hand:
-
Test with Sample Data:
- If you wish to experiment with Sample Data, select ‘Sample Data’ from the Date Range dropdown menu.
- This will provide you with a set of test data encompassing various advertisement types.
- Choose your desired data type from the Sample Data by selecting it from the Ads Type dropdown menu.
-
Fill in the Required Information:
- Complete all the mandatory fields in the sidebar menu, including your TikTok Advertiser ID, TikTok Access Token, Ads Type, Date Range, and the Shemetov Token.
-
Fetch Data:
- Click the ‘Get Data’ button, and the advertising statistics data will be fetched onto the ‘TikTok’ sheet.
By following these steps and providing the required data, you can efficiently test the “TikTok Ad Insights Connector” with Sample Data or utilize it to analyze your advertising data using real TikTok information right within Google Spreadsheets.

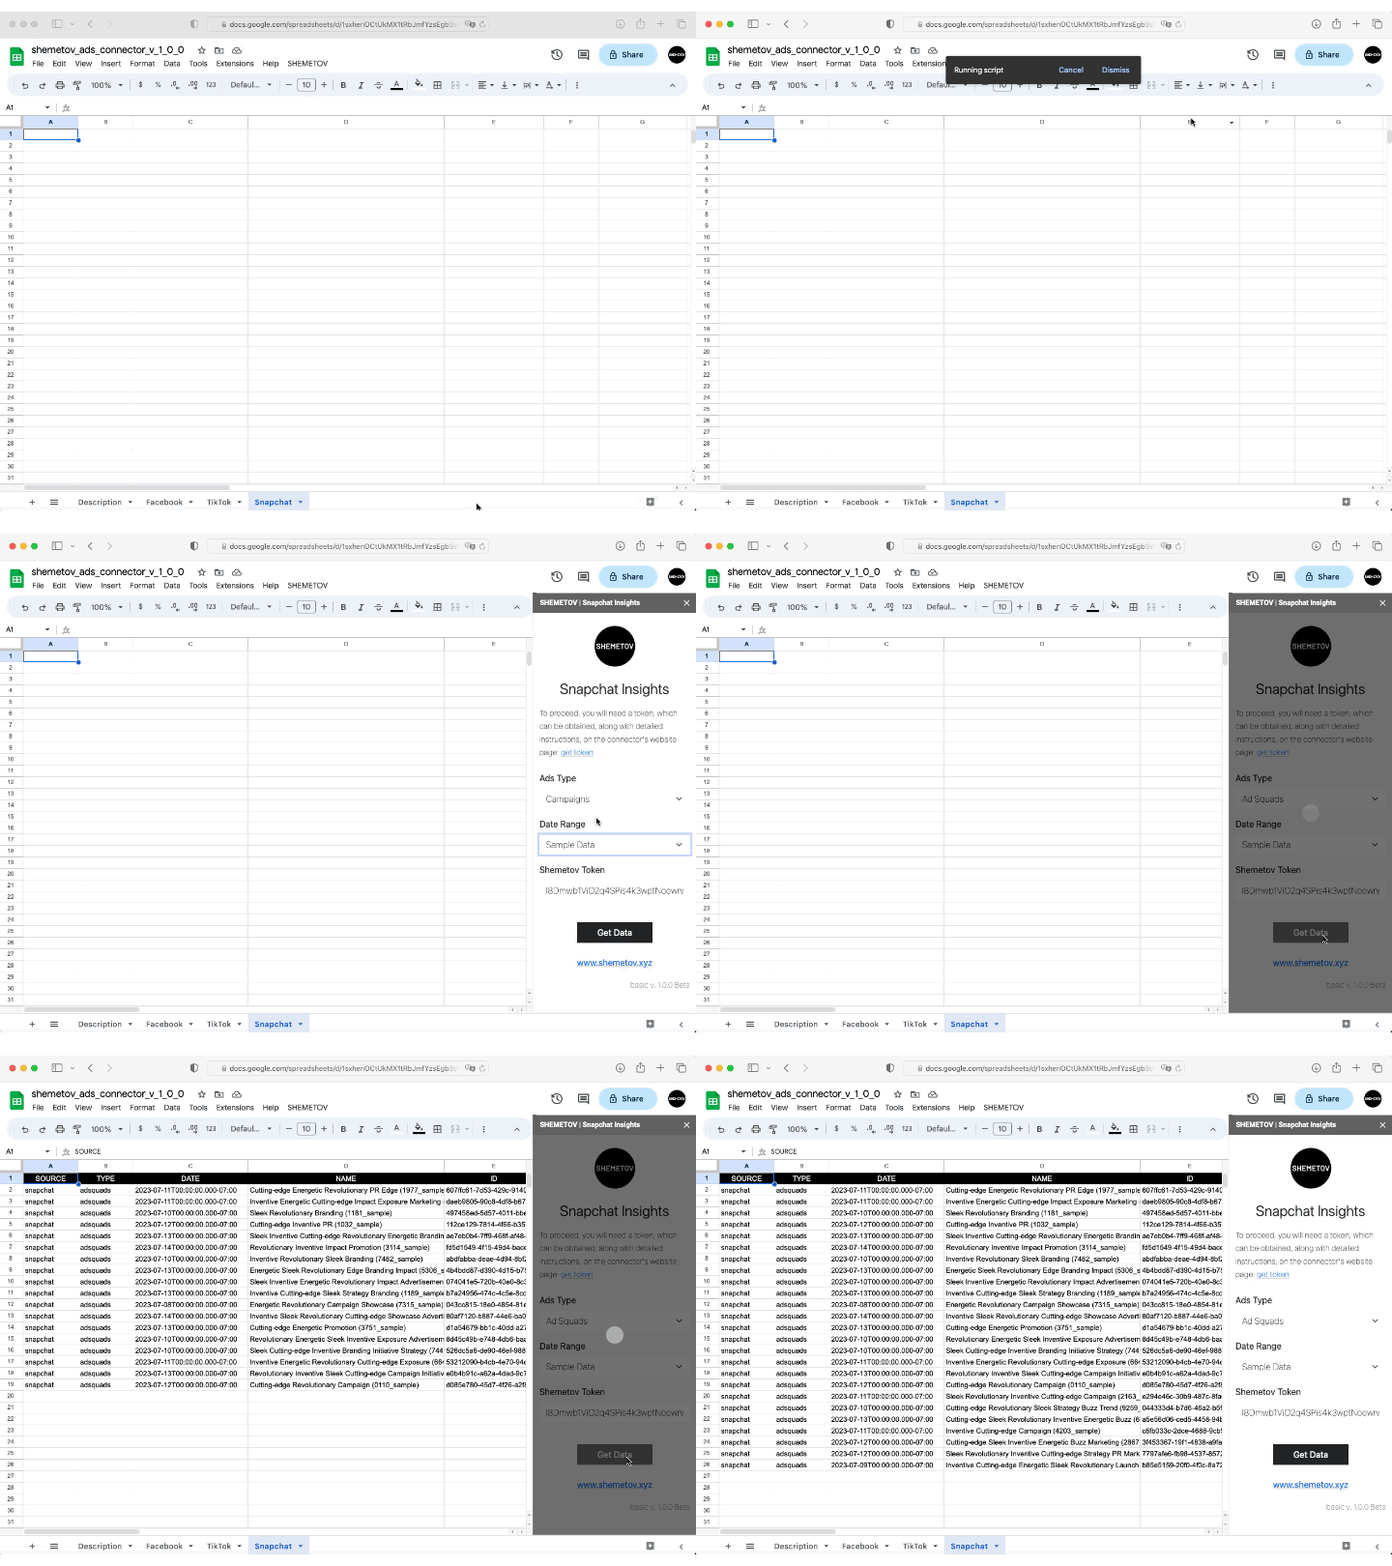
To make the best use of the “SnapChat Connector for Google Sheets” or explore Sample Data for Snapchat, follow these easy-to-follow instructions:
-
Access the Unique Google Spreadsheet Template:
- Open the Google Spreadsheet template via the provided link ‘Get the app’.
- Make a copy of the template in your preferred location on Google Drive.
-
Navigate to the ‘Snapchat’ Sheet:
- Inside the spreadsheet, find and click on the sheet labeled ‘Snapchat.’
-
Access the SnapChat Connector Settings:
- In the menu bar, click on ‘SHEMETOV.’
- Choose ‘Social Insights,’ followed by ‘Snapchat Insights’ from the dropdown menu.
- The SnapChat Connector settings window will appear on the right side of the screen.
-
Gather the Necessary Data:
- To utilize the connector, ensure you have the following information at hand:
- Snapchat Ad Account ID
- Snapchat Client ID
- Snapchat Client Secret
- Snapchat Refresh Token
- Ads Type (Select your preferred advertisement type from the dropdown menu.)
- Date Range (You can either choose ‘Sample Data’ from the dropdown for testing purposes or select a specific date range.)
- Additionally, you’ll need the ‘Shemetov Token,’ which you can obtain by registering through the provided form.
- To utilize the connector, ensure you have the following information at hand:
-
Test with Sample Data:
- If you wish to experiment with Sample Data, select ‘Sample Data’ from the Date Range dropdown menu.
- This will provide you with a set of test data encompassing various advertisement types.
- Choose your desired data type from the Sample Data by selecting it from the Ads Type dropdown menu.
-
Input the Required Details:
- Fill in all the mandatory fields in the sidebar menu, including your Snapchat Ad Account ID, Client ID, Client Secret, Refresh Token, Ads Type, Date Range, and the SnapConnect Token.
-
Fetch the Data:
- Click the ‘Get Data’ button to initiate the retrieval of advertising statistics data onto the ‘Snapchat’ sheet.
By following these comprehensive instructions and providing the necessary data, you can efficiently explore the capabilities of “SnapConnect for Google Sheets” with Sample Data or analyze real Snapchat advertising data directly within Google Spreadsheets.
The data connectors for various platforms, comes with certain limitations to ensure smooth and efficient data retrieval and to prevent excessive strain on the system.
-
Retrieval of Limited Elements: The connector might impose limitations on the number of elements (e.g., campaigns, ad groups, ads) that can be retrieved in a single request. For example, it may retrieve data only for the first 25 elements with the status “ACTIVE” for campaigns, ad groups, or ads. This is done to focus on the most relevant and currently active entities.
-
Monthly Request Limits: To manage the usage of the connector and maintain system performance, there are monthly limits on the number of API requests you can make. Each time you fetch data using the connector, it consumes one request from your monthly allowance.
-
Request Count Management: It is crucial to keep track of the number of requests made within a given month to stay within the allowed limits. Once the monthly limit is reached, the connector may restrict additional requests until the next monthly cycle starts.
-
Load Control: The limitations and request restrictions are in place to control the load on the connector and the underlying API systems. This helps ensure fair usage and prevents overwhelming the platforms’ servers.
By being mindful of these limitations and managing your request count responsibly, you can effectively work with data connectors for various platforms while maintaining a smooth and reliable data retrieval process. Always review the specific documentation for each connector to understand its unique limitations and usage guidelines.
